Blog: General

I was recently assisting a client who was receiving TSCAL (licensing) errors when logging into 2008 terminal server via a Wyse thin client.  After researching found that it was caused by the default User not having write access to the registry that is needed to be able to re-write the hardware ID under MS licensing.  Here is how I was able to fix the problem: [more]

  1. Login as Administrator locally in to the device and disable the write filter
  2. Launch the registry editor and navigate in to Hkey_local_machine\Software\Microsoft\
  3. Select MSLicensing > right click select Permission  > Click on Advance tab
  4. Set the User  and the Power User  to have full control


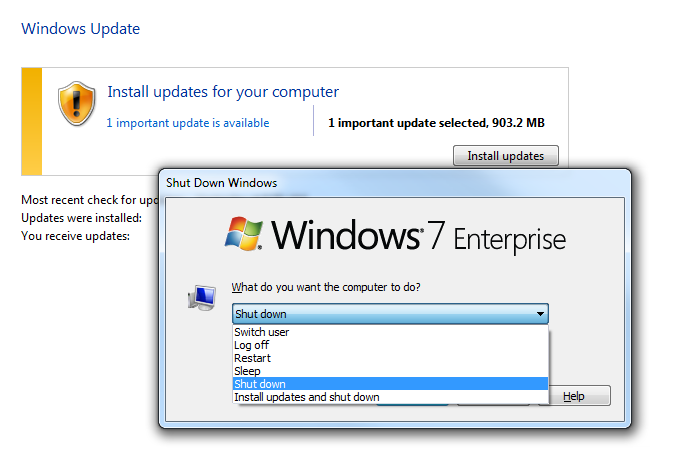
When out of town on an audit there are times when I need to shutdown my laptop (rather than just letting it go to sleep) but I don't want to take the time or chance any problems when installing Windows updates. For example, I needed to get to a bank for a meeting and installing updates first thing in the morning wasn't what I need to happen (especially when one was Windows 7 Service Pack 1 which would take a long time to install).

The problem is when I use the Start button to select shutdown, the only option I have is install updates first then shutdown. A co-worker showed me there is a plain shutdown option available if you use Alt-F4 - easiest if all windows are minimized. That's a good one to know! [more]


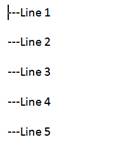
If you’d like to delete a “block” of text such as spacing at the beginning of several rows of text, use the Ctrl+Shift+F8 key combination.

Place your cursor at the beginning of the first line, press Ctrl+Shift+F8 [more]

Use the right arrow key to highlight the area you wish to delete on the first row, then the down arrow to highlight the same area on the additional lines.

Presto, change-o…the unwanted text (or spaces) are gone!

Line 1
Line 2
Line 3
Line 4
Line 5

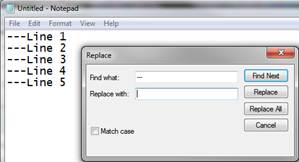
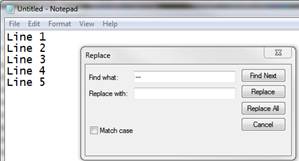
This is admittedly not as cool, but I accomplish the same thing in Notepad (assuming the block of “text” I want to delete on each line is identical) by using Ctrl+H (Replace), entering the “text” (or spaces) I wish to delete, leaving the “Replace with” field blank and clicking Replace All.


I recently ran into a problem with Windows 7 UAC where we had a VBS file that was calling the application SETACL.  In order for SETACL to run properly, it must be “Run as Administrator”.  I could set the option in SETACL to “Run as Administrator” in the applications properties, but when the script called the application, UAC would not prompt the user to elevate privileges.

I wanted to see about right clicking the VBS file to select the “Run as Administrator” option, but Windows does not include that option in the context menu by default.

In order to add the option, you can add it to the registry.  Copy the following into a .reg file and then merge the file into the registry: [more]

[HKEY_LOCAL_MACHINE\SOFTWARE\Classes\VBSFile\Shell\runas\Command]
@=hex(2):22,00,25,00,53,00,79,00,73,00,74,00,65,00,6d,00,52,00,6f,00,6f,00,74,\
  00,25,00,5c,00,53,00,79,00,73,00,74,00,65,00,6d,00,33,00,32,00,5c,00,57,00,\
  53,00,63,00,72,00,69,00,70,00,74,00,2e,00,65,00,78,00,65,00,22,00,20,00,22,\
  00,25,00,31,00,22,00,20,00,25,00,2a,00,00,00

After merging the key, I was able to select “Run as Administrator” when right clicking the VBS file and the call to SETACL also ran correctly. It's a good idea bo backup your registry before making manual changes.


I came across an interesting feature of Gmail the other day.  Apparently you can add a little something extra to your e-mail address to better help your mail filters or just track who is selling your e-mail address.  To use this feature, simply add a '+string' to the 'username' portion of your address.  For example, if your e-mail address was [email protected], you could track your messages from Amazon.com by using [email protected] in all your Amazon communication.  This would make it really easy to apply mail filters no matter what the sending address is (since some sending addresses can be pretty crazy).  Another nice "feature" is being able to track who is selling your e-mail address… though you still might not have much recourse.  If you'd like another variation that still delivers to your gmail Inbox, you can also use the domain googlemail.com.  Not sure why you'd want to, but to each his own.


At some point my system icons disappeared from my system tray (the little tray at the left edge of the Windows task bar).  Here is what I wanted it to look like:

I found may posts and complaints about this problem spanning XP, Vista and now Windows 7.  Most said, try this fix (a variety of suggestions)…it may or may not work.  Most folks said they could restart their systems and the icons would come back.  However, restarting did not work for me.  And besides, restarting a system is a disruptive and time consuming process.  I wanted and needed a better solution. [more]
 
At this point I have restored my icons and they have remained visible for 3 or 4 days.  In those days, there have been a couple of restarts and a shut down – I hope they are fixed.
 
I actually did a couple of things, reconfigured local group policies and also made a couple of registry changes.  It appears that it took both fixes together to restore my icons.
 
To change local group policies, enter gpedit.msc in "Run" or as a command line entry.  You will see the local group policy window:

Notice, in the screen shot above, you navigate down to "User Configurations," "Administrative Templates," and "Start Menu and Taskbar."  There the "Remove Clock…," "Remove network icon," "Remove batter meter (my icons are for a laptop with a battery)," and "Remove volume…," were all listed as Not configured.  According to the information I found I changed all the settings to "Disabled."
 
I also changed two Registry entries.  [All the normal warnings apply about being careful as you click around in the registry.  Any false moves while in the Registry can really mess things up.]  Having said that, use Regedit (entered in "Run") to be able to edit the Registry as follows.
 
Locate and click the following registry subkey:

  • In the Details pane, click the IconStreams registry entry.
  • On the Edit menu, click Delete, and then click Yes.
  • In the Details pane, click the PastIconsStream registry entry.
  • On the Edit menu, click Delete, and then click Yes.
  • Exit Registry Editor.

Restart the Explorer.exe process. To do these, follow these steps:

  • Press CTRL+SHIFT+ESC.
  • On the Processes tab in Task Manager, click the explorer.exe process, and then click End Process two times.
  • On the File menu, click New Tasks (Run), type explorer, and then click OK.
  • Exit Task Manager.

Then if you are using Windows 7 you need to be sure the icons settings are set to ON.  So follow these additional steps:

  • Open the Control Panel "Taskbar and Start Menu."
  • Under the Taskbar tab, in the Notification area section click on the "Customize" button.
  • In the Notification Area window notice the link "Turn system icons on or off." Click on the link and make sure the icons your prefer are turned ON.

Hopefully my icons will stay visible and this will be helpful for any others who have some system icons which disappear.


A while back I started receiving unwanted automated calls on my Motorola Android phone at night.  It was an automated service calling my number frequently.  It was only a recorded voice on the other side.  I didn't want to turn off my ringer incase a call I was expecting came through.  It's easy to effectively block a number on your android phone without installing any apps.  Just follow these steps: [more]

  1. Add the number as a contact.
  2. Edit the contact.
  3. Tap the menu button and then select "Options".
  4. Select "Send calls directly to voicemail".

That's it.


If you haven't looked at Google's browser Chrome, now is a great time. Google wants Chrome to be the fastest, most secure and stable browser available to get more users of Google sites and viewers of Google ads. Chrome is available for Windows, OS X, and Linux. After you install Chrome from http://google.com/chrome, the program will update automatically when a new version is available. The goal of the automatic update is to not only to fix bugs as soon as possible, but to introduce new features quickly. Two new and useful features are searchable options and browser sync.  [more]

A major problem with any program is where to find the settings or options you want to change. The standard practice is to arrange the most settings/options in groups that seem to be related. Unfortunately most programmers have a different idea about what 'related' features go together compared to normal users. Chrome has implemented a search box for settings and options that makes finding what you need amazingly fast and simple. For example if you want to check the options for managing stored passwords, just enter "password" in the Options search and you will see all the settings for passwords.

The search even tells you when the searched term in on a dialog.

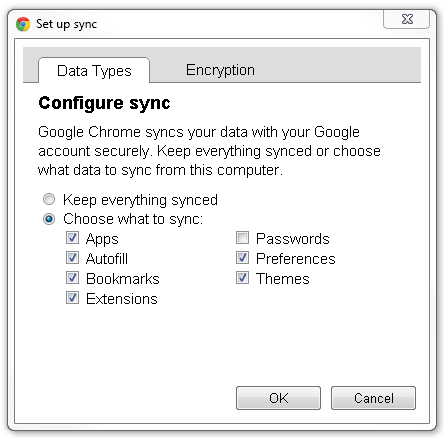
After getting Chrome to work just the way you want, it's a major pain to remember all the extensions and preferences when you setup another computer. That's where Chrome's Sync function comes in handy. If you have a Google account, you can save any installed Apps, form auto-fill values, bookmarks, extensions, passwords, preferences, and themes on Google's servers. Then when you choose to sync another Chrome installation on another computer, the new browser will look and act just like the one you configured. The sync works across different operating systems as well. You can chose to only sync some data. For example you might not want to sync passwords across different browsers.


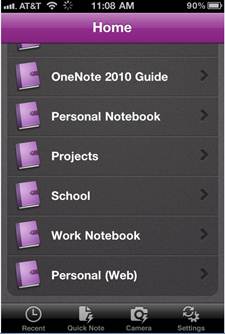
MobileNoter is an iPhone App which makes Microsoft OneNote notebooks and notes available on the iPhone.

It offers two synching options, cloud and WiFi.  I chose the WiFi version because auditors use OneNote for customer notes and information.  It  costs $15, a lot for an App, not much for business software.

WiFi allows you to synch between the Microsoft OneNote application on your computer and MobileNoter on the iPhone.  Both devices must be on the same WiFi network.  You install MobileNoter on the iPhone and a synch application on the computer.  You then pair the devices to setup the connection between the two.  With that done, you select items from OneNote to be available for synching.  Then you launch MobileNoter on the iPhone and select synch. You can view and edit on the iPhone.

Microsoft has been developing a method for you to get to your notebooks seemingly anywhere. Simply upload your notebook into the cloud (under your Microsoft Live) username and you can log into to a web portal running a lite version of OneNote. If that isn’t quite good enough (and you’re an Apple iPhone user), there’s an MS developed app that can help you out. [more]

This app with sync to your cloud account and let you view a read-only copy of your notebooks. Simply search the app store for Microsoft OneNote.


I was utilizing a new USB headphone/microphone set instead of my normal devices which plug into the jacks on the side of the computer.  Everything worked great when the computer detected the new USB audio device and installed the driver.  Unfortunately, when I was done with the USB device and attempted to connect the old set of headphones, the computer would not detect them.

Upon further investigation, the computer told me there was no audio jack installed on the computer at all!  Evidently the USB device driver had disabled the audio jack completely to where it could not even be detected.  To regain sound, I had to uninstall the USB audio device driver.  This allowed me to access my audio jack settings again.

Beware of what certain device drivers can do!