Blog: Apple

If you're frustrated with trying to edit text on your mobile device and placing the cursor in the correct location, try this:
  • Press and hold the space bar on the virtual keyboard
  • When the keyboard goes blank (on iOS), drag the cursor where you want to edit then release
  • This also works in all directions so you can move the cursor up and down, or left/right. You don't have to stay in the area of the virtual keyboard.


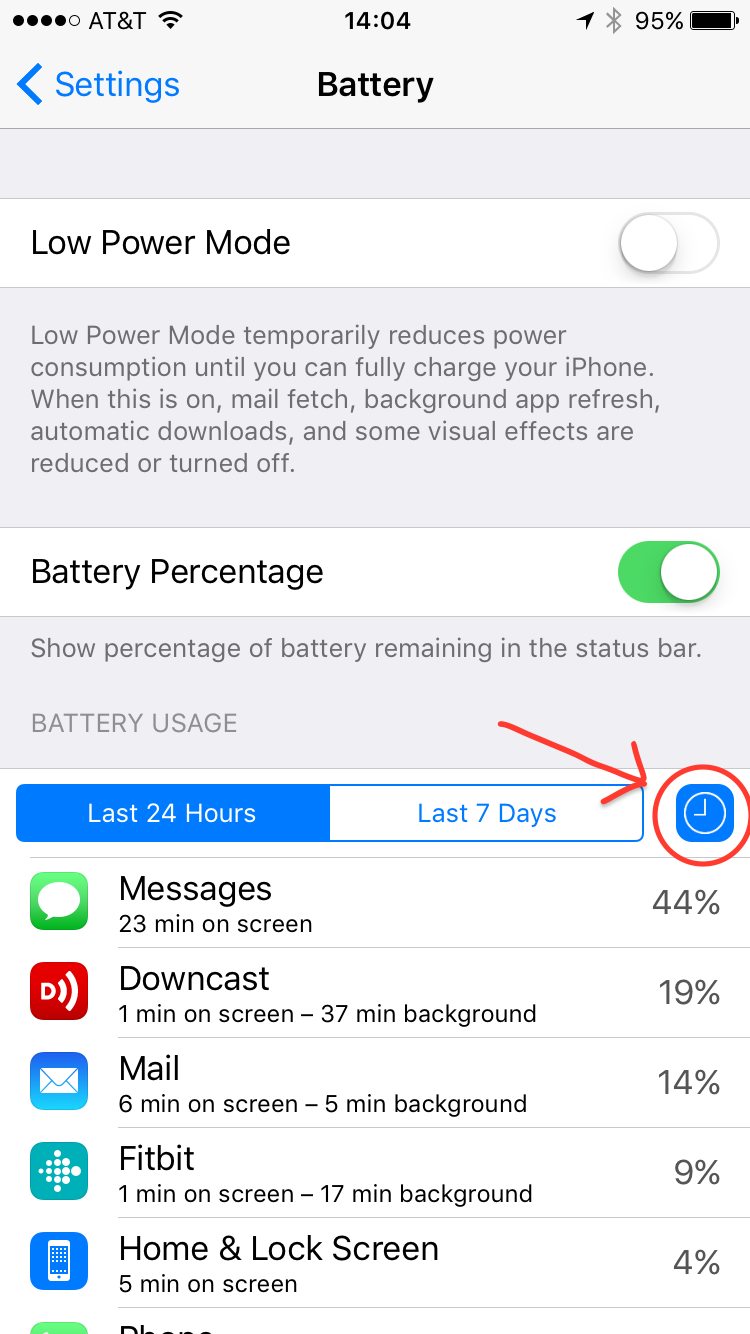
In iOS 8 Apple introduced a new Battery section to Settings that shows how applications are using battery resources. With iOS 9 this feature was improved by showing active vs. background activity. To enable this, tap on the clock symbol in the Battery area. An application that is consuming lots of battery in the background usually has a stuck process or a software bug.


iOS 9 now will "help you out" by having the device switch to cellular data if it thinks your Wi-Fi connection is too slow. This could end up using more of your cellular data than you'd like. This appears to be turned on by default after the upgrade. You can turn it off by going to Settings -> Cellular then finding Wi-Fi Assist at the bottom of the screen.


I'm a big fan of using dd to do byte for byte copies of disks and partitions.  However, I've noticed the performance of dd in OSX is usually pretty poor.  Most people recommend toying around with the 'bs' option (for byte size) to find the optimal copy "chunk" size.  I've always had the best results using bs=512k, but even that didn't seem to help when I was recently trying to copy the contents of an old hard disk to a new one.  Both disks were connected to the internal SATA controller, but I was only getting a 15 MB/s copy rate. 

When running the command, I used the device specifications as enumerated by 'diskutil list' (e.g., dd if=/dev/disk0 of=/dev/disk1 bs=512k).  However, after some research, I found that you can place an 'r' in front of the disk# specification to access the "raw" disk and significantly improve performance.  So, I tried "dd if=/dev/rdisk0 of=/dev/rdisk1 bs=512k" and I started getting a 90+ MB/s copy rate. 


After carrying an iPhone for about 4 years, I recently made the leap to Android…with some trepidation. My iPhones had always worked with few hiccups.

The reason for the switch, you ask?

First, Apple hasn’t gotten a clue yet that their iPhone screen size compares poorly to many Android smartphones.

Secondly, I hate iTunes. I’d never had an Apple product of any kind until my first iPhone. And, with it, the necessary installation of iTunes. Most of my 4,000 song music library are WMA files ripped from my own CDs. iTunes doesn’t play WMA files but it will gladly convert them to MP3 files and, in so doing, create duplicate files on your hard drive. Since my music library already consumed almost 20GBs of HD space, duplicate music files are not insignificant. But, wasted HD space wasn’t the worst of the process. In the conversion, the metadata on many of the files did not convert correctly...album info, artist info, etc. was fouled up and album art was, too. I don’t know how many hours I wasted trying to clean up the mess – when everything was perfect in Windows Media Player before. And, of course, Windows Media Player saw the new (duplicate) MP3 files and added them to the WMP library. Lovely. And, iTunes invariably charges more for music than Amazon. And, you get their stupid proprietary music file format. And, you better hope you have a backup because, according to many friends, you’re out of luck if your HD dies. Did I say I HATE iTunes?

Lastly, it has always gotten under my skin that Apple refuses to include memory card slots in their devices. Forcing you to spend $100 for an incremental increase in storage capacity. Shameful!

Well, I bought the Samsung Galaxy Note 2. I could go on and on about the ginormous screen and cool S Pen. The quad core processor and 2 GBs of RAM make for a blazing fast response. But, you can read all about it here: http://www.samsung.com/us/the-next-big-thing-galaxy-note-ii/?cid=ppc-

As to the reasons for my conversion:

  1. The aforementioned 5.5” HD Super AMOLED display is massive compared to my old iPhone 4 (and even the only slightly larger iPhone 5)
  2. No more iTunes. I copied my music library by dragging and dropping it into the Music folder on my Note 2, which is recognized on my Windows 7 system with a cheap, non-proprietary USB cable. Boom…done!
  3. I doubled the phone’s 16GB memory capacity with a $10 microSD card.

I did lose 2 apps (of dozens) in the process: A disc golf scorecard app and the T. Rowe Price app. Every other app on my iPhone was available in the Google Play store. I haven’t even gone looking in the other Android stores.

Don’t be afraid to free yourself from the Apple shackles! Life is good on the other side.


I was troubleshooting something on my phone a while back and through the process, I had realized that I should flush the DNS cache on my phone. The problem was, however, I had no idea how to go about doing that. Of course, I could just reboot the phone and be done with it, but that took time and if I had to do it multiple times, it quickly became impractical. Instead, I stumbled upon a much simpler solution: put the phone in airplane mode. This completely disables all network connectivity until you drop out of airplane mode again and has the natural side effect of flushing the DNS cache of the phone.


iPhone screen captures:  If you want to capture the iPhone screen, hold down the power/lock button on the top of the phone, then press the “menu” button. The screen will flash white and the screen capture will be added to the Camera Roll.  Earlier incarnations of this feature said you need to hold down the menu button then press the power/lock button. This sequence does not work on the newer 4 and 4s models.


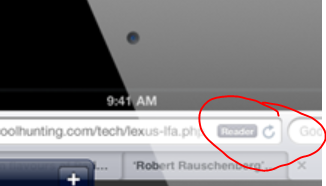
Read Articles without Clutter:  There is a new “Reader” button on Safari, under IOS 5 (ipads, iphones), that allows you to read the web page textual data without the surrounding clutter (advertisements).  This button is located in the url window as shown below.  There is similar functionality for other browsers supplied by Readability:  http://www.readability.com/. [more]


I recently helped a customer having trouble with FaceTime and iMessage not working with his iPod touch. He was able to browse the web and get to the App Store, but the FaceTime and iMessage applications would not work. I connected my cell phone and was able to use FaceTime, a WiFi only application. I assumed this meant the problem was with his iPod, not his wireless Internet. However, his iPod worked correctly when he connected to a different wireless network. The problem fixed itself for about a week at his house, then started happening again. I did some reading and found that this could have been caused by DNS. I changed the DNS servers on his router to use different DNS servers. Immediately the problem was fixed.

Thinking back on my testing, I did not take into account that my phone could have been using 3G DNS servers during the first test. The lesson here is to be careful when using cell phones to test wireless connectivity.


Below are the steps to reset the passcode on an iPhone.

Warning: this will wipe all files, settings, and apps from the iPhone, including the passcode 

  1. Need computer (with iTunes) and USB cable
  2. Make sure iTunes in running on your system
  3. Press and hold the Home and Power button at the same time until the iPhone turns off
  4. Release the Power button, but continue to hold the Home button
  5. Plug the USB cable into the computer & iPhone (while holding the Home button)
  6. Continue to hold the Home button until an alert message in iTunes appears that reads “iTunes has detected an iPhone in recovery mode.  You must restore this iPhone before it can be used with iTunes.” – click OK
  7. In iTunes, under “summary” tab, click the “Restore” button to restore the iPhone