Blog: Windows 2003 Server

There was a customer that had been migrating printers from Windows 2003 SBS Domain Controller/Print Server to Windows 2008 and somehow in the process accidentally deleted all of the shared printers.  When this happened, all printing at the company came to a halt.  There were almost 20 different printers that had been deleted including all the share names, printer ports, specific settings, etc.  It was going to be next to impossible to try and recreate the printers exactly as they were within a decent amount of time.

The customer had VEEAM backups of the system drive, but we decided that restoring the entire drive would most likely be a BAD idea on a Domain Controller.  Our preferred plan at this point was to try and merge the printer registry keys from a backup into the current registry.  From VEEAM, we restored the C:\Windows\System32\Config folder to an alternate location.  This folder contains the registry files named SYSTEM, SOFTWARE, etc.  TIP: If you do not have backup of the files, you may be able to find copies of registry files in C:\Windows\Repair folder.  Just make sure and look at the timestamps of the modification dates to see if they might be usable. [more]

What we concluded before beginning was that local printers were stored in the registry at HKLM\SYSTEM\CurrentControlSet\Control\Print\Printers.  The actual printer shares and security settings were stored in HKLM\SYSTEM\CurrentControlSet\services\LanmanServer\Shares.  At this point make sure you backup the current registry by doing an export.

Using the LOAD HIVE method in the registry, we mounted our SYSTEM file as SYSTEM_Backup under HKLM.  However, the CurrentControlSet subkey was not there.  Instead it only had CurrentControlSet001 and CurrentControlset003.  Also, the Printers subkey was missing in both CurrentControlSet001 and 003.  The reason CurrentControlSet is not there is because it is simply a pointer to CurrentControlSet001.  You can verify this by looking at the HKLM\SYSTEM\Select subkey. 

The main problem was that we had no idea where the Printers subkey was.  I had a feeling that it was also dynamically linked from somewhere else in the registry, so I created a new printer with a unique name as a test and did a registry search.  I found what appeared to be all of the printer settings in HKLM\SOFTWARE\Microsoft\Windows NT\CurrentVersion\Print.  Now, I went back and loaded the SOFTWARE file as SOFTWARE_Backup under HKLM.  When I looked in the Print subkey, I saw all the missing printers.  It appears that this location is linked with the missing Printers subkey under Control\Print.

Now to get the data we need for all the printers and the shares, I exported HKEY_LOCAL_MACHINE\SOFTWARE_Backup\Microsoft\Windows NT\CurrentVersion\Print and HKEY_LOCAL_MACHINE\SYSTEM_Backup\ControlSet001\Services\lanmanserver from the loaded registry hives.  After that is done, unload the backup hives as they are no longer needed. 

Right click your two exported .reg files and open with notepad.  Do a replace on SOFTWARE_Backup with SOFTWARE and the same for SYSTEM_Backup with SYSTEM in the appropriate files.  After that, the registry files are ready for merging.  Right click the .reg file and select "Merge."

After we merged the registry files, we thought we may have to reboot to get the printers to appear, but simply restarting the Print Spool service made the printers reappear like magic.

 

I had worked on a server that had corrupted NTOSKRNL.EXE and HAL.DLL files causing the server to be unable to boot.  With the Windows 2003 CD in the system, I could access the recovery console.  The files are compressed on the Windows CD in the i386 folder in files ntoskrnl.ex_ and hal.dl_ respectively.

*TIP* By typing the command "MAP" you can see which drive the cd-rom is mapped to as well as the local hard disks.

In order to extract the files, you are supposed to use the expand command like the following: "expand <cd-drive-letter>:\i386\ntoskrnl.ex_ c:\windows\system32".  Do the same for hal.dl_.

The problem that I had was that it said "access denied" when trying to expand the files or copy anything to the C drive.  I could rename the existing files as a backup without any problems.  In order to get around this problem to expand the files from the disk, you can use the SET command. [more]

Typing "SET" command in recovery console will show you the following four settings. By default all entries are set to FALSE.

allowwildcards = Turning this variable on will allow you to use wildcards (the asterisk) with certain commands.
allowallpaths = This variable, when enabled, will allow you to change directories to any folder on any drive.
allowremovablemedia = Turning on this variable will allow you to copy files from the hard drive to any removable media that Windows recognizes.
nocopyprompt = When this variable is enabled, you will not see a message when you try to copy over another file.

Type "set AllowRemovableMedia = TRUE" and then it will let you expand the files from the CD to the hard disk.


A week or so ago, I had a task to do some work on the VMware cluster for one of our customers. It was late (~11:00 PM) when I finished the task, but I decided to go ahead and try to do a P2V conversion on one of the physical servers that we had targeted for virtualization a long time ago. It’s that server that sits in the corner and just keeps running…and nobody knows a thing about it. Everybody is just happy it keeps running because it’s on 10 year old hardware. It’s the poster child for virtualization. I was 90% sure that the conversion wouldn’t even kick off because the server has such an odd-ball configuration, but to my surprise it worked fine. P2V conversion was done in about 90 minutes (~12:30 AM). When I do these conversions, the first thing I do is start the VM up without the NICs connected just to see if the new VM will boot.

I knew it was too good to be true...BSOD with immediate reboot. Error message “Inaccessible boot device”. If it were any other error message, I probably would have just hung it up for the night, but I have fixed conversions that give this error a number of times. Most of the time it’s due to the existence of a recovery partition on the physical system and the boot.ini has the wrong partition numbers in the boot parameters…easy fix. I attached the vmdk to a helper VM to access the files. The boot.ini file looked fine and all the files necessary for boot made it over. So, I took a closer look at the conversion logs. I didn’t notice it while the conversion was running, but right at the end of the job, a warning was logged…”virtual machine reconfiguration failed”. So what is reconfiguration… never noticed that before. [more]

The “reconfiguration” keyword as well as the stop code led me to the following VMware article: http://kb.vmware.com/selfservice/microsites/search.do?cmd=displayKC&externalId=1005208. Basically, the article provides instructions on how to inject the VMware SCSI controller driver into the physical machine pre-conversion. The reconfiguration task that failed on the conversion indicated that VMware was unable to inject the driver and registry keys into the VM post conversion…ah yes, the odd-ball configuration. The server was built with only a 100 MB c:\ partition. The c:\ partition only contains the windows boot files. The boot.ini references the \windows folder on partition(2), which is the d:\ drive. Why was the server built that way??...nobody knows. So, VMware tried to inject the drivers to fix the boot problem, but couldn’t because it doesn’t read the boot.ini to find out where the \windows folder it. It just assumes it will be at c:\windows and that c:\ will be partition(1). So, there is the cause…so how do I fix it. By this time, its 1:30 AM and I really didn’t want to wait 90 minutes for the conversion to run again. The article explains how to fix this problem. I just had to figure out how to make those changes post-conversion. Specifically, we want to follow the Windows 2003 (lsilogic controller) instructions. So here we go.

  1.  Copying the symmpi.sys file to the %systemroot%\system32\drivers\ folder is pretty easy. Just mount the vmdk to a helper VM and copy the file from another windows 2003 virtual machine (on vmware of course) to the target vmdk.
  2. The registry edits is where it gets a little tricky. The goal in this step is to manually load the registry hives for the VM that won’t boot and inject the .reg file changes into the registry.
    • Follow the article to export the registry sub-hives to .reg files from another windows 2003 virtual machine.
    • From your helper VM where your unbootable vmdk is mounted, using regedit.exe, highlight HKEY_LOCAL_MACHINE and choose File -> Load Hive.
    • Browse to %systemroot%\system32\config inside your unbootable vmdk. For this instance, it was on partition(2) or d:\windows\system32\config. This directory contains all the physical files that provide the registry tree. Choose the file named “system” to load.
    • You will be prompted for a name to load it as…just type the hostname of the unbootable VM (server1). This will load the system hive for the unbootable VM under HKEY_LOCAL_MACHINE in regedit.
    • If you browse down into that mounted registry hive, you will see there is no CurrentControlSet. Your registry keys that were exported need to be put back in CurrentControlSet. Your safest bet is to restore the registry hives into ALL control sets so that you can be sure you get it in the right spot.
    • You have to make sure that the registry changes get imported into the mounted registry hive and not your local machine registry hive. Open the .reg files and do a search and replace for the string “HKEY_LOCAL_MACHINE\system\currentcontrolset” and replace it with HKEY_LOCAL_MACHINE\server1\system\controlset001”. As mentioned in the step above, you may have multiple controlsets (controlset001, controlset002, etc.) which means you will have to edit the .reg file multiple times and re-merge it to get the registry settings into all control sets.
    • Right-click on each of the .reg files and merge them. Double-check to make sure all the entries got added.
    • Highlight HKEY_LOCAL_MACHINE\server1, and choose File à Unload Hive to unmount system registry file.
  3. Remove the vmdk from the helper virtual machine. Make sure to just disconnect it and not delete it from disk.
  4. Start your previously unbootable virtual machine. Should work find now. (3:00 AM)

So, this process is way easier if you just re-do the conversion. I ended up having to do this conversion again due to other circumstances and did the injection pre-conversion the second time and it works as well. However, I have had conversions that took 4-5 hours due to the amount of data involved. This process is obviously justified in those situations.


A customer who does CPA work, was getting errors submitting tax returns electronically. They were instructed to install an update to install the new forms needed. During the installation by one of the employees, it stopped responding and only half installed. They had been instructed to reinstall the old version over the current  install then run the update again. I was asked to perform the procedure.

Every time I attempted to re-install the older version it would hang and then give me an error that it was the wrong operating system.  I attempted the install from a Windows 2003 and Windows XP system which is how it is normally installed. After consulting with ProSystems support found that the problem was that the Microsoft installer was trying to run with the installation. The tech said “right after starting the install, open the task manager and kill any instances of MSIEXEC.exe that is running”. I did this and the install ran without any problem. I then apply the updates and it installed the needed updates, using the built in update agent, without any issues.

The nice thing is that when I asked the tech if this was documented anywhere, his response was “nope”.


A local IT support customer who does CPA work, was getting errors submitting tax returns electronically. They were instructed to install an update to install the new forms needed. During the installation by one of the employees, it stopped responding and only half installed. They had been instructed to reinstall the old version over the current  install then run the update again. I was asked to perform the procedure. Every time I attempted to re-install the older version it would hang and then give me an error that it was the wrong operating system.  I attempted the install from a Windows 2003 and Windows XP system which is how it is normally installed.

After consulting with ProSystems support found that the problem was that the Microsoft installer was trying to run with the installation. The tech said “right after starting the install, open the task manager and kill any instances of MSIEXEC.exe that is running”. I did this and the install ran without any problem. I then apply the updates and it installed the needed updates, using the built in update agent, without any issues.

The nice thing is that when I asked the tech if this was documented anywhere, his response was “nope”.


I was tasked with upgrading a 2003 Windows Server to 2008 over the weekend recently and ran into a few minor issues trying to get the upgrade started. The main one was that the Server 2008 installer would not continue past the compatibility check as long as Windows PowerShell 1.0 was installed. PowerShell 1.0 was released as a hotfix prior to server 2003 SP2 and was included in the SP2 package. When I went into Add/Remove Programs, I didn’t see the PowerShell update in the list. Even after removing SP2, PowerShell was still present on the server and would not allow the Server 2008 upgrade to even start. [more]

I wanted to try manually uninstalling the hotfix from the $NtUninstallKBXXXXXX$ folders located in C:\Windows, but the folder that housed the PowerShell 1.0 hotfix info was nowhere to be found. Most likely, someone had removed those folders to clean up disk space or they were removed with the installation of SP2. In either case, I was stuck.

Fortunately, we had another Server 2003 32bit machine running out on the network that still had the $NtUninstallKBXXXXXX$ folder that I needed. I copied it over to this original box and tried the uninstaller. It successfully uninstalled PowerShell without any extra registration on my part! After this was removed, the upgrade to Server 2008 ran smoothly.


I had an IT consulting customer email me requesting assistance with extending the system partition on a Windows 2003 virtual machine. The partition had been running low on disk space for a while. The customer had extended the vmdk using VMware, but was unable to extend the partition using diskpart. This is normal behavior for a Windows 2003 system so I scheduled downtime so that I could use VMware Converter to fix the problem.

I have done this operation a number to times in the past. You simply tell Converter to convert the VM and target the same ESX cluster with the imported copy. During the operation, VMware gives you the option to change the partition size. Windows recognizes the partition size change at first boot and you are good to go. However, the customer failed to tell me that they had un-marked the c:\ drive partition as active while trying to get the disk to extend. When I shut the VM down to clone it, it never came back up. Neither did the imported copy. Both were completely useless. They would boot to an “Operating System not found” error. [more]

I tried fixboot and fixmbr from the recovery console but neither worked. I ended up restoring from a CommVault backup. Later, based on some comments from coworkers, I decided to see if I could fix this problem by mounting the disk to another VM and adding back the “active partition” status. I mounted the vmdk that was broken to a Windows 2008 server and using disk manager re-marked the partition as active. Sure enough, after dismounting from the temp VM the original VM booted up no problem. Just one more reason to use virtual machines.


Changing Product Key on Windows 2003 (and SBS2003):  I needed to change the product key on a SBS machine that was virtualized from an IT consulting customer’s machine. I did not want to re-activate the SBS machine using the customer’s key since the machine was still active and did not want to interfere with the proper operation of the production machine. I needed to install our MSDN key since this is the proper usage for that type situation.

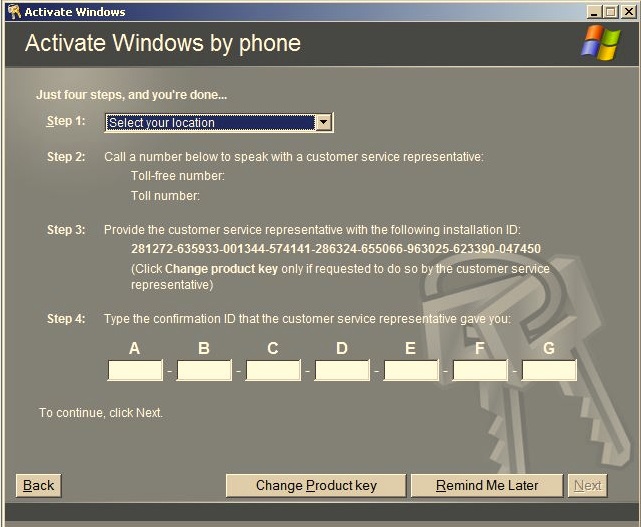
In order to do this, when the product ask you to activate, chose the option to telephone a customer service representative to activate Windows.  Then when the Activate Windows by phone comes up, chose the “Change Product Key” at the bottom to enter the new product key. Then cancel out of this operation and activate the windows over the internet as usual. [more]


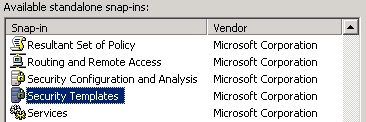
I needed to turn on NTFS file system auditing for two specific application EXE files on 30+ servers.  I didn’t want to have to touch each server individually, so I decided to look into applying the audit settings centrally using group policy.  Using the Security Templates snap-in for MMC on one of the systems I wanted to set up auditing for, I was able to configure a custom file system security policy.

 Security Templates Snap-in:

Within the Security Templates MMC: [more]

  1. Define a new, empty security template
  2. Expand the new Template
  3. Right click on the File System section
  4. Select "Ad File..."
  5. Browse to the file you want to ad a group policy enforced ACL to
  6. Configure your desired access controls/audit settings
  7. Set appropriate inheritance options
  8. Once the policy settings you want are complete, right click the security template name
  9. Select "Save As..."
  10. Save the INF file somewhere
  11. Delete the security template

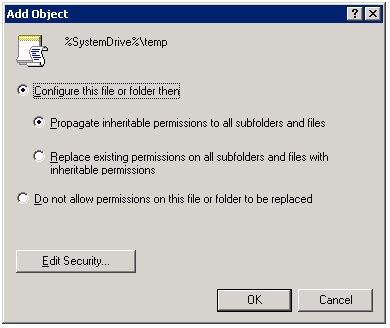
In my case, I only wanted to apply the audit policy portion of the ACL (not the file system permissions), so I opened the INF file and removed the permission settings that started with “D:PAR” and just left the “S:AR” settings.

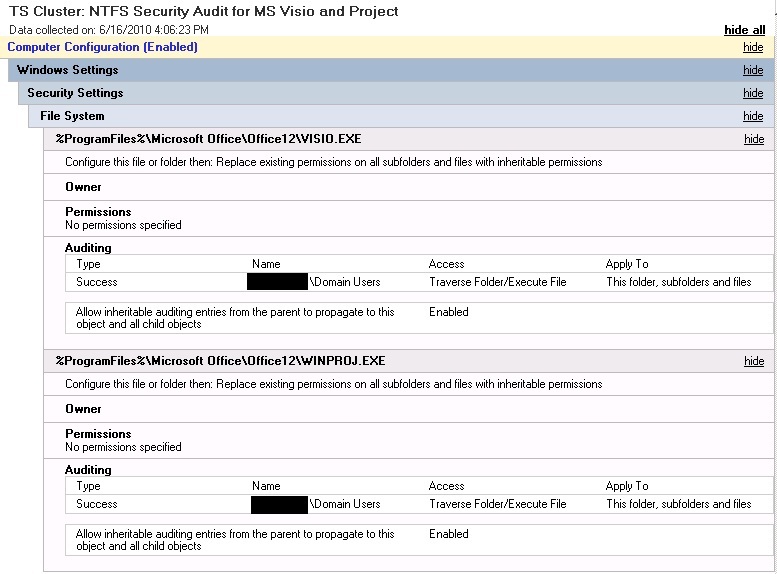
Then, using the Group Policy Management console, I was able to create a new group policy object and import my file system auditing settings from the INF.  I then applied the group policy to the proper OUs and waited for the new settings to get applied.  Everything worked like a charm.  The completed policy looks like this (in the Group Policy Management HTM view):


We recently encountered a problem where users were unable to type in the password or username box after locking Terminal Server sessions from their Thin Clients. Their keyboards were responsive (pressing CAPS Lock key initiated the notification on the Terminal Server) but the cursor or any keys entered would not show up.

It is suspected that one of the multiple windows updates that were released for the month of June may have caused this. Users started complaining the day after the updates were applied. However, testing was not completed to determine which one of the updates caused this or if removal of the update fixed the issue.

Here is the workaround we found:  The problem does not occur if the user locks their screen using the left CTRL+ALT combination. This issue only presents itself if the user locked their session using the right CTRL+ALT key combination. If the user does lock their session using the right CTRL+ALT key combination and is presented with the problem, pressing the left CTRL+ALT keys simultaneously will allow the user to enter their information into the password\username boxes to unlock their session.