Blog: OneNote

Windows 10 ships with the OneNote app. If you also have OneNote 2016 installed on your computer, you will end up having two OneNote applications installed. The Windows 10 OneNote app is quite often set as the default version, so when attempting to follow a link from someone else, the Windows 10 OneNote app opens and asks you to log in. People who are familiar with OneNote 2016 are completely lost and stuck at this point.


To change the default version to OneNote 2016, go to your Start Menu, then choose Settings. Select System, choose ‘Default apps’ and then scroll to the bottom of the list to find ‘Set defaults by app’ entry. Click on this link and in the list under ‘Set your default programs’, find the OneNote (desktop) version, and select ‘Set this program as default’. Click OK to save your changes.

 

OneNote is a great application because it allows you to collect all types of digital information – text, images, audio, video and organize it all in a fashion of tabbed notebooks. And then, after all the info is collected, OneNote allows you to search through tabbed sections of an entire notebook or all the notebooks you have open. "Search" is a powerful feature of OneNote.

Until recently I was disappointed with "Search" in 2010. You could still search all the places I described, but in OneNote versions prior to 2010, when you searched, the search results pane would open and you would be able to cycle through all the search results by clicking on Next and Previous icons in order to see each of the occurrences. In 2010 I thought the Next and Previous options were gone, at least they weren’t visible in my OneNote.

I started thinking maybe I had missed a settings option. So I started researching. I learned the search features are different, but I am happy some of the old benefits are still available. Here is how it works now. [more]

You still click in the search box and type what you want to find (you get to set the default scope of the search as well as select it each time if you want). When you do this, OneNote opens a pop-up box to show you the quick results of your search. If you see what you need in the pop-up box, you can click on it and see the page. However, if you click outside the pop-up box to view more content on a page, the pop-up box closes. That was frustrating because I thought there was no way to see all the individual search results.

There are more options. When the pop-up box appears, you can elect to "Open the Search Results Pane" (click a link at the bottom of the pop-up box or type "Alt-O"). In previous versions of OneNote, the Search Results Pane would open automatically which I liked. With the Search Results Pane open you will see all the pages listed where the searched text appears and they remain available as long as you keep the Search Result Pane open. You can click on any page and see the first occurrence of the found text. Then I learned when you press "Return" you will jump to the next occurrence. By repeatedly pressing ‘Return’ you will be able to see all the search results. Not the old way, but in time I may like it better.

A bonus OneNote feature is the character recognition. When you paste an image that contains text, OneNote gives you the option of making the text in the image searchable. In testing the search features I saw OneNote was searching the text in images, even though I had not previously made the image searchable. Very cool.


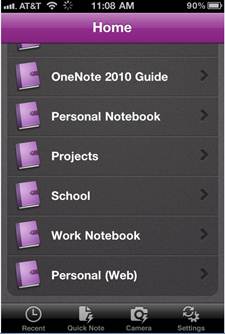
MobileNoter is an iPhone App which makes Microsoft OneNote notebooks and notes available on the iPhone.

It offers two synching options, cloud and WiFi.  I chose the WiFi version because auditors use OneNote for customer notes and information.  It  costs $15, a lot for an App, not much for business software.

WiFi allows you to synch between the Microsoft OneNote application on your computer and MobileNoter on the iPhone.  Both devices must be on the same WiFi network.  You install MobileNoter on the iPhone and a synch application on the computer.  You then pair the devices to setup the connection between the two.  With that done, you select items from OneNote to be available for synching.  Then you launch MobileNoter on the iPhone and select synch. You can view and edit on the iPhone.

Microsoft has been developing a method for you to get to your notebooks seemingly anywhere. Simply upload your notebook into the cloud (under your Microsoft Live) username and you can log into to a web portal running a lite version of OneNote. If that isn’t quite good enough (and you’re an Apple iPhone user), there’s an MS developed app that can help you out. [more]

This app with sync to your cloud account and let you view a read-only copy of your notebooks. Simply search the app store for Microsoft OneNote.


I’ve been a part of the Office 2010 Technical Preview program for a little while now and have been impressed with a few of the changes that have been made from Office 2007. I received an email last week saying that the Technical Preview is coming to a close this month (November) and will be transitioning to a Beta release. I don’t know if this will be a public Beta release or not, but I’m definitely excited to get a new build of Office 2010 installed for play… I mean, “testing.”

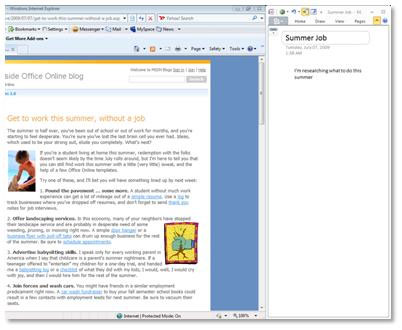
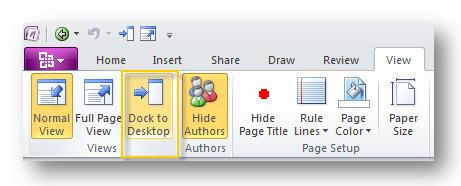
One of my favorite new additions is in OneNote 2010. You can now dock your notes to the desktop (as demonstrated in the two pictures below) which allows you to take notes while looking at other documents, webpages, etc. [more]