Blog: Networking

After installing Windows 10, I decided I wanted to try out the Mail Desktop App.  I added my Exchange  account in the Settings->Accounts-> Add account. After adding my credentials, I got this message:

This caused the Windows 10 lock out policy to be inherited from the policy that is a part of Exchange Activsync, which locks the device after one or three minutes (depending on the policies set up for Activsync).

By removing the Exchange account from the Windows 10 Mail app, it also removed the Activesync enforcement of lockout and hence the lockout times reverted to being controlled by the power manager application.

 

There was a 2012 R2 server I had configured and been using to test with for several months. After a few months, I could no longer connect to the server with remote desktop. I could ping the server and browse the admin shares across the network. I logged in and verified the Remote Desktop Services service was started and enabled.

Looking at the event log, I could see that every time I tried to remote in, the System log was adding event 36870 – “A fatal error occurred when attempting to access the SSL server credential private key. The error code returned from the cryptographic module is 0x8009030D. The internal error state is 10001.”

More research seemed to indicate that this was a problem with the Remote Desktop certificate on the system.  I opened the certificate manager for the local system, backed up the remote desktop certificate and then deleted it the certificate store.  Now, when I restarted the Remote Desktop Services service, I started getting a different event 1058 – “The RD Session Host Server has failed to replace the expired self-signed certificate used for RD Session Host Server authentication on SSL connections.  Access is denied.”

More research pointed me to checking the permissions in C:\ProgramData\Microsoft\Crypto\RSA\MachineKeys.  When I tried to set a permission on the folder, it propagated to all the files within except for one which said that access was denied.  I was unable to modify the permissions on the file itself even though I was logged in as the local administrator.

Taking a chance, I stopped the Remote Desktop Services service and was able to delete the file with the permission issues.  I restarted the Remote Desktop Services service and observed that a new Remote Desktop certificate had been created as well as a new file in the MachineKeys folder.  I was now able to connect to the server using remote desktop.


Recently we've been experiencing a problem with the Cisco AnyConnect client disconnecting and reconnecting shortly after the initial connection is established. Originally we thought that this was a bug in the client. Cisco recommended switching to an IKEv2 connection profile, but the disconnect problem was never resolved, even with updated versions of the client. During a recent remote session with Cisco support, the root cause of the disconnects was discovered.

In later versions of the AnyConnect client, there are two protocols in use:  SSL and DTLS. DTLS is a variant of TLS that uses datagrams which are sensitive to delay. After authentication, the client attempts to negotiate a DLTS connection. If that negotiation is unsuccessful, the client disconnects and reconnects using SSL only. DTLS uses UDP port 443. In our test environment, the remote access firewall is behind another firewall that was only allowing TCP port 443 through. After updating the firewall rule to allow UDP port 443 as well, the disconnects stopped occurring.


A customer called after getting disconnected from their VM. He gave us a possible cause to his issue, stating “Right before I had this problem, I had an interesting icon in the system tray. I clicked on it and it said it was ejecting the floppy. That's when my connection dropped and I couldn't get back in.”
 
I logged onto the vSphere management console and noticed the virtual machine no longer had a NIC attached. I added the NIC back and had him test logging into the virtual machine. Everything worked. Then I started trying to figure out how he removed a NIC from the VM without editing the configuration, which he doesn’t have permission to do. Turns out he did exactly what he said he did.

According to http://kb.vmware.com/kb/1020718, ESX/ESXi v4.x and later include a feature called HotPlug. In some deployments the virtual NICs can appear as removable devices on the System Tray in Windows guest operating systems. Problems can occur if you mistake this device for one that you can safely remove. This is particularly true in VMware View environments, where interaction with the Desktop is constant. The moral of this story is do not remove virtual NICs from the Windows System Tray.


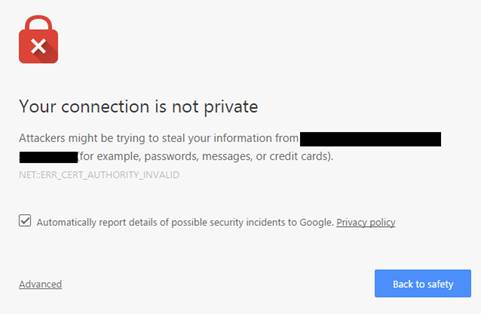
There is a feature in Google Chrome that can make browsing secure internal web sites a little less painful and possibly more efficient. When you access a site with a self-signed, untrusted, or expired certificate, Chrome will present you with a warning in your browser like below:

This is intended to protect you from going to a site that may have been compromised by some type of man-in-the-middle attack. However when you browse to an internal management interface like a UPS or other appliance, you're likely going to receive this warning because IT administrators typically don’t install public certificates on these peripheral devices. Therefore, we know that this certificate is untrusted and would prefer not to see the warning every time because it will always be untrusted.
 
Enter chrome://flags. This includes the under-the-hood settings for Chrome – similar to about:config in Firefox.
 
The Flags area allows you to configure a setting to bypass the SSL warning every time you visit for a period of time. Setting this for 1 week is typical but you can extend it to up to three months.


We have been working on updating a customer’s network to a new set of servers and PCs. The customer purchased Open License licenses for Windows 8.1 so we could image the PCs, rather than setting each one up individually. We decided to use the Microsoft Deployment Toolkit to deploy these images over the network rather than deploying the image via a USB/CD.
 
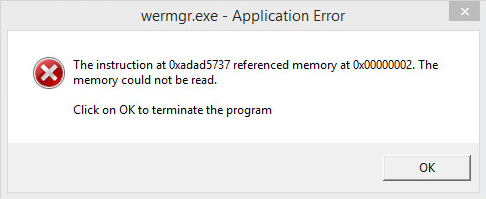
We installed a few applications that did not have server components initially. After the server components had been upgraded, we installed the client components for these pieces of software on the PC we were using to build our image. We then installed Microsoft updates. I had planned to start imaging the PC the next morning, but when I arrived the error message below was on the screen.


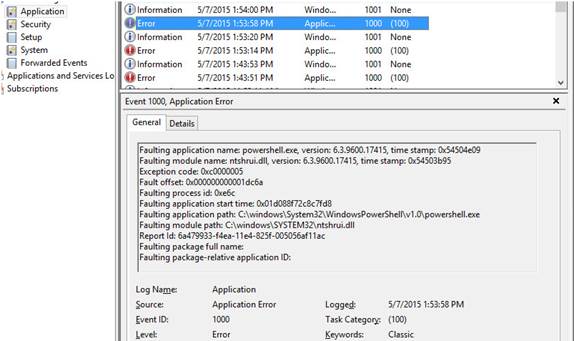
I received buffer overflow messages when troubleshooting with Process Monitoring and errors like this appeared in the Event Viewer:


I thought the problem might be with the image PC, so I rebuilt the image. After installing updates on the second PC and letting it sit overnight, the second PC started giving me the same errors. I knew this was not a problem before the second set of software was installed and updates were applied. I started looking into all of the updates that were installed, but realized this was going to take a long time because there were over 100 updates that had been installed. I decided to rebuild the image again, but not install updates. After doing this, the same error occurred after letting the PC sit powered on for about five hours.
 
After doing some testing, I found that it was only Windows applications that would give these error messages (PowerShell, Internet Explorer, Notepad, etc.) I started looking at the programs that were installed in the second set of updates instead. My theory was that one of these applications could be causing the problems and that it was likely that the program hooked a Windows process somehow. The only software that was installed that met this criteria was PrintAudit, which is a program that tracks print jobs so the cost of printing files can be passed on to the customer. Having three PCs to test on, I uninstalled PrintAudit from one of the PCs, waited overnight, and did not have any errors the next morning. I also built a Windows 8.1 VM and only installed PrintAudit. The VM with only PrintAudit installed gave the same errors after about 5 hours. Uninstalling the PrintAudit client would return the PC to a working condition.
 
I contacted PrintAudit tech support and they said that Windows 8.1 was supported and that they had others customers running Windows 8.1. During this time I found that adding one of the applications that was throwing the errors to the PrintAudit exclusion list would cause that application to run properly. I also contacted Microsoft and they examined the PC. They did not find any errors in the OS and said the problem was with the PrintAudit software.
 
I contacted PrintAudit tech support again and they attempted to recreate the problem, but were unable to do so. Both PrintAudit and myself were running Windows 8.1 on 64 bit virtual machines. After thinking about what could be different in my setup and the setup at PrintAudit tech support, I realized that the license key on my VMs were not activated. They were not activated as I did not want to use an activation on a machine that was going to get reimaged. I asked PrintAudit tech support if their VM was licensed and they said it was. As a test, I activated my testing VM, waiting overnight, and did not have any problems the next morning.
 
This shows that there are some Windows processes that do not work on an unactivated copy of Windows 8.1. There is some evidence of this on the Internet, but Microsoft has not confirmed nor provided a list of things that do not work on an unactivated copy of Windows 8.1.


We had users testing with 2012 R2 Remote Desktop servers recently, and we came across a problem with viewing multiple pages in .tif files using the default viewer.  For this customer we decided to use a third party photo viewer utility called Irfanview.
 
Naturally, the next step was setting the .tif “open with” settings to use the new viewer for all users.  We came across a few articles about implementing User Group Policy Preferences –> Folder Option –> Open With settings.  When we tried to configure it, it didn’t change anything on 2012 R2 server. This worked in previous versions of Windows.
 
After more research we found this is now done by creating a default associations configuration file using DISM and then creating a GPO to use the resultant XML file.
 
1. Set the file associations that you need.
2. Export the settings using command “Dism /Online /Export-DefaultAppAssociations:<path>\default_associations.xml”.
3. Create a GPO and configure the Computer configuration\Administrative templates\Windows Components\File Explorer\Set a default associations configuration file.  Specify the path to the XML file you created.  This will change the registry settings in HKLM\Software\Policies\Microsoft\Windows\System\DefaultAssociationsConfiguration to the specified XML file.
 
The following is an example of the associations in the XML configuration that I used:
 
<?xml version="1.0" encoding="UTF-8"?>
<DefaultAssociations>
  <Association Identifier=".gif" ProgId="IrfanView.GIF" ApplicationName="IrfanView" />
  <Association Identifier=".jpe" ProgId="IrfanView.JPG" ApplicationName="IrfanView" />
  <Association Identifier=".jpg" ProgId="IrfanView.JPG" ApplicationName="IrfanView" />
  <Association Identifier=".jpeg" ProgId="IrfanView.JPG" ApplicationName="IrfanView" />
  <Association Identifier=".png" ProgId="IrfanView.PNG" ApplicationName="IrfanView" />
  <Association Identifier=".tif" ProgId="IrfanView.TIF" ApplicationName="IrfanView" />
  <Association Identifier=".tiff" ProgId="IrfanView.TIF" ApplicationName="IrfanView" />
</DefaultAssociations>


We recently encountered a strange issue with a customer running Outlook 2010 in an Exchange 2007 environment. Some users (not all) would randomly get certificate warning pop-ups in Outlook. The certificate warnings indicated the Fully Qualified Domain Name (FQDN) "autodiscover.customerdomain.com" wasn’t on the certificate. The certificate warning was legitimate; that FQDN was not on the certificate because this customer didn't have a UCC certificate.

However, all the autodiscover SCP records had been changed via Powershell to point the autodiscover URL to "webmail.customerdomain.com" which WAS on the certificate. All the PCs were joined to the Active Directory domain so the SCP lookup should have had precedence over any other autodiscover method. Doing an autodiscover check via the Outlook system tray icon indicated the certificate warning pop-up and all the values returned by the test were all correct.

The question was why were these PC's even contacting "autodiscover.customerdomain.com"? After much troubleshooting, we found that even though the domain SCP records were correct, some Outlook clients were also doing DNS lookups for "autodiscover.customerdomain.com" in parallel with the SCP lookup. Checking DNS there was an "autodiscover.customerdomain.com" A record and pointed to the IP address of the Exchange server; however, since that FQDN wasn’t a subject alternate name on the certificate, it would have legitimately generated the certificate warning.

The resolution was to simply remove the "autodiscover.customerdomain.com" A record from DNS and we added SRV records for good measure. It doesn’t seem like having that A record in DNS would have mattered since the autodiscover priority shouldn’t have ever used it, but from now on we will use DNS SRV records and SCP exclusively for Exchange autodiscover.


Here is a very handy Microsoft article about how to install Windows Updates to a Windows 7 Embedded device that uses a File-Based Write Filter (FBWF) or an Enhanced Write Filter (EWF).  This is a great tool to use on Thin Clients that can’t be managed by HPDM or SCCM.

https://msdn.microsoft.com/en-us/library/ff850921.aspx

The process includes a running a Scheduled Task, which calls a VBS script.  That VBS Script handles disabling the write filter, downloading and installing updates, then re-enabling the write filter and committing the changes.
 
The VBS script and .xml scheduled task files are available here: https://www.microsoft.com/en-us/download/details.aspx?id=15143

Note: This will not install updates that display a setup UI (Service Packs, new IE Versions) as a part of the installation.


All versions of Java 8 update 20 and newer have removed the Medium Security Level. The only options now are High and Very High. Adding a site to the exception list will still allow unsigned applications to run. See the following webpage for more information: http://java.com/en/download/help/jcp_security.xml.
 
The exception file entries and the prompts associated with them are stored in these files under "%USERPROFILE%\AppData\LocalLow\Sun\Java\Deployment":
deployment.properties
exception.sites
trusted.certs
 
If the same sites need to be added to a large number of computers or thin clients across an organization, you can use Group Policy to copy these into the user’s profile at logon.